Receiving a Webhook Event Payload
In this guide, we're going to talk through the the following steps to setup a webhook integration with Fleetio. There are two steps to the process:
- Create a webhook subscription for an event in Fleetio
- Verify the authenticity of incoming webhook messages
Please visit our Webhooks overview and Webhook Event Reference for general information, requirements, and which events are available.
Create a webhook subscription
To add a Webhook, log in to the Fleetio dashboard, and navigate to Account Settings.
Under the Administration section of the sidebar, click on Webhooks, and then click the + Add Webhook button.
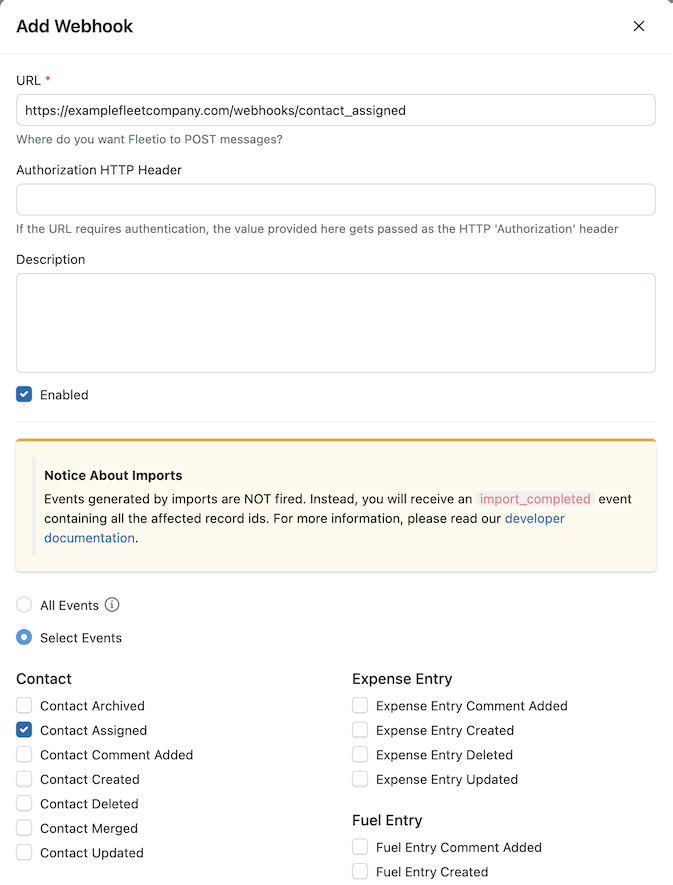
In this example, we are the Example Fleet Company, and we want to be notified when a contact is assigned. To accomplish this, we can create a webhook and subscribe it to the Contact Assigned event. We'll use /webhooks/contact_assigned as the webhook's target endpoint on our server.
We'll click Save, and then we'll look at how to verify incoming messages.
Verifying the authenticity of incoming webhook messages
In order to protect your endpoint from malicious hackers, Fleetio signs each message with a shared key that you can find by selecting the "View Secret Key" action in the dropdown menu of your webhook. Using this key, Fleetio computes the HMAC SHA-256 digest with the message body and sends it in the X-Fleetio-Webhook-Signature HTTP header.
In order to verify that the message came from Fleetio, all you have to do is compute the HMAC SHA-256 digest of the raw HTTP body using the webhook secret as the key, and compare it with the X-Fleetio-Webhook-Signature HTTP header.
In Ruby, it would look like this:
OpenSSL::HMAC.hexdigest(OpenSSL::Digest.new('sha256'), webhook.shared_key, message.body)